

The lightning object creator is a great tool that allows a user to create a brand new custom object, complete with fields in far less time than it would if we were creating each field manually!
The first step to using lightning object creator is finding it. This is done by going into setup and then to Object Manager. In this example, we’ll be creating a simple invoice object.
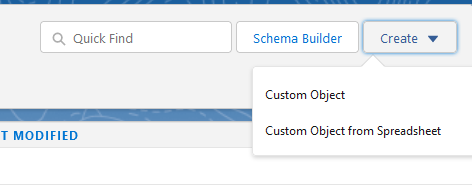
Once you’re in the Object Manager, navigate to the create button and then select the “Custom Object from Spreadsheet” option.
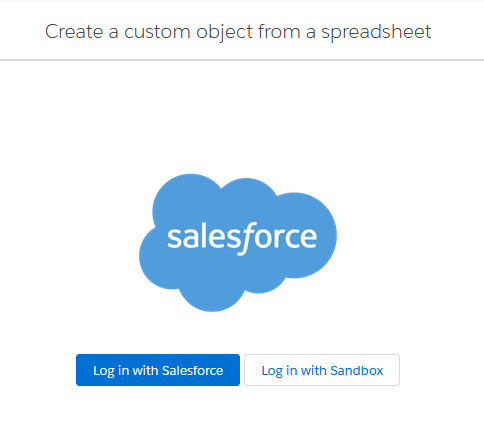
-Once we’ve selected “Custom Object from Spreadsheet”, you’ll need to log in to Salesforce again, depending on whether you’re currently working in a Sandbox or not, you’ll need to select either the login with Salesforce or Log in with Sandbox option.
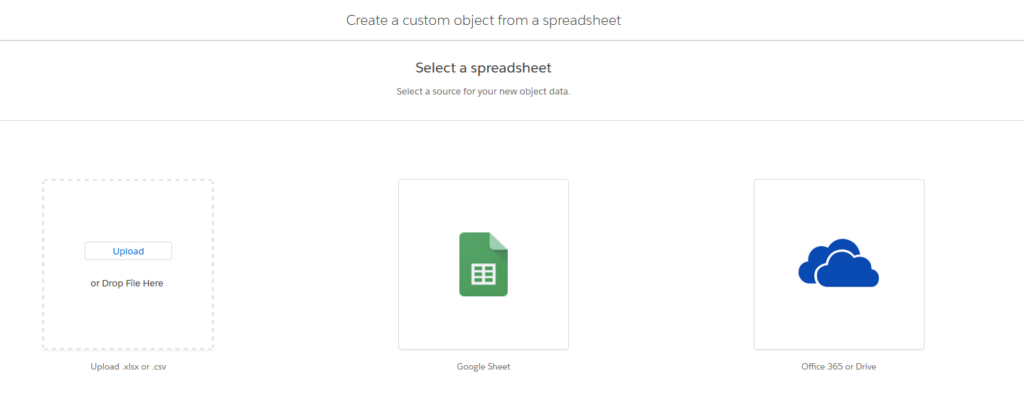
Once you’ve logged in, you can select a spreadsheet in one of three ways, these are: Upload a file from your local computer (This will accept either .xlsx or .csv files), or you can select a file from either Google Sheets or Office 365/Drive. In this example, we’ll be uploading our file from our local computer.
Once we’ve selected our spreadsheet, we’ll be brought to the below page. This page allows us to view the fields we’re looking to create on our new custom object, and further options to customise the new object.

As this page has a large amount of information, we’ll break this down into two sections, the first section is called “CSV File Details”, and we’ll go through these left to right:
- Encoding Format – This is the encoding format of your selected file, Salesforce will attempt to detect the encoding and set this for you, however, if this is incorrect, you can change this here.
- Values Separated By – This field allows you to set the format that your values are separated by for example, CSVs are separated by Commas.
- Field Source Label – This allows you to select whether you would like the field labels to be set from the headers on the column or you can define these yourself.
- Field Labels Row – This allows you to determine the row that the field labels are located on.
- Import X rows of data? – Using this option you can choose to import data along with the creation of the custom object.
- Record Field Name – This picklist allows you to determine whether Salesforce should create a default record name, or whether this should be defined from one of the headers on your spreadsheet.

Now that we’ve reviewed our file details we can review the table that displays our mappings. As you can see we have several columns here, and each row is a header on our spreadsheet that will be used to create our fields on our object. We can edit these names if required, and also change the field type by using the “Salesforce Field Type” Picklist.
The “Add to Layouts” checkbox allows us to select up to ten fields to include on default compact layouts and the “All” List view on the object, and the final column shows us a preview of the data (If available).

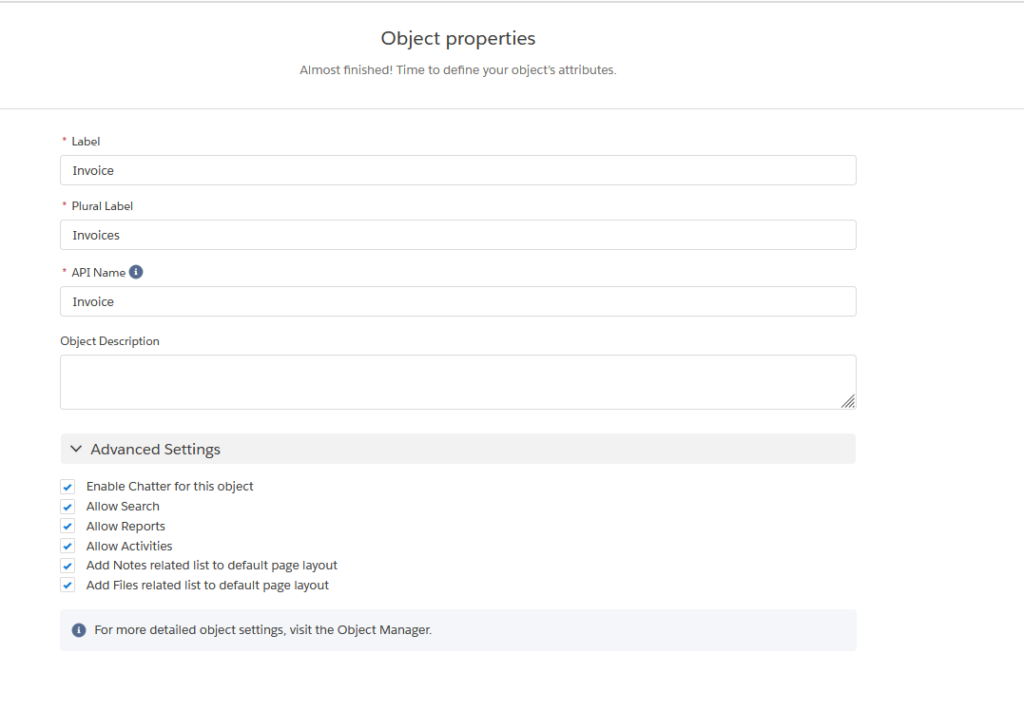
Once we’ve reviewed this page we can press next. This page will let us define our object label and plural label along with the API name, and add an object description if required.
In the advanced settings, we have several options that will all be checked by default, these can be reviewed and toggled on and off as required.
Once this page has been reviewed, the final step is to press the finish button and begin the let the Lightning Object Creator do the hard work for you!
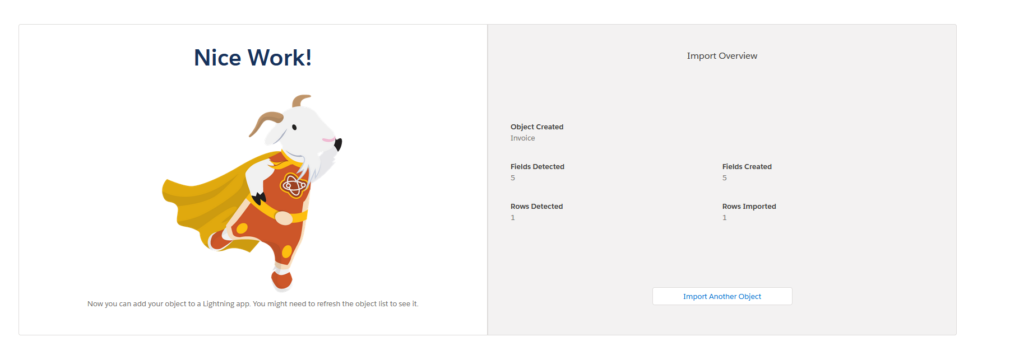
After the object has been created you’ll see a message similar to the one below:
And that’s all there is to it! Now that you’ve read about creating objects in this manner, any new custom objects should be ready in a snap!
Thanks for reading,
Calum Chappell
The Tether Team
#salesforce #salesforcecrm #tethertips #tether #lightning #org