

For a long time with Salesforce, the admin had to spend the majority of their User Interface (UI) work on the page layout. Adding things like buttons and choosing where the fields are displayed on the page was typically configured there. Admins can still continue to do this but over the past few years, newer functionality has been rolled out on the Lightning Page.
Dynamic Actions which I have spoken about previously allow the user to add buttons to the record page and also control visibility to these buttons based on certain criteria. Dynamic Forms takes a similar approach to what fields and sections should be displayed.
Step 1 – Upgrade to Dynamic Forms
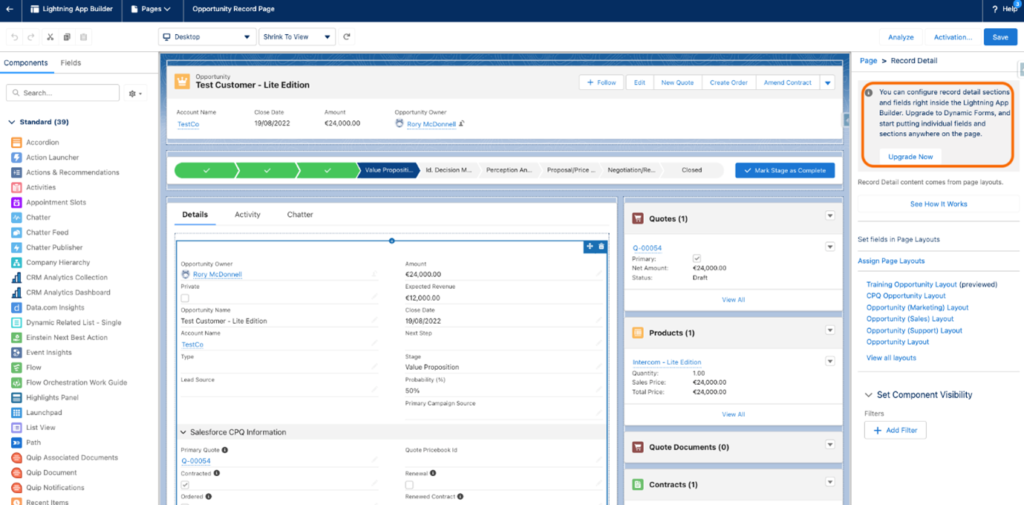
To begin with go to the object where you would like to make some UI changes, click ‘Edit Page’ then click on the ‘Record Detail’ component. On the right-hand side, you will see a button to ‘Upgrade Now’ to Dynamic Forms. Select your page layout and follow the other instructions.
Step 2 – Build your page layout
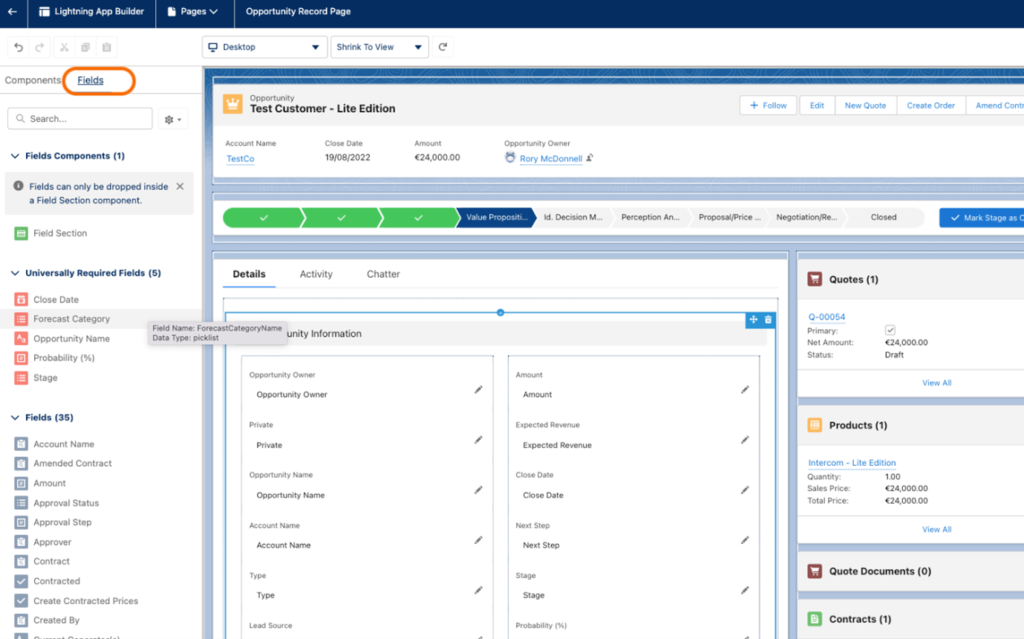
On the left-hand side of the screen click on the tab for ‘Fields’. Here you will find a list of field components that can be used to build your page. You can then start deleting fields from the existing page, dragging new fields onto the page, moving fields around, adding sections and, so on.
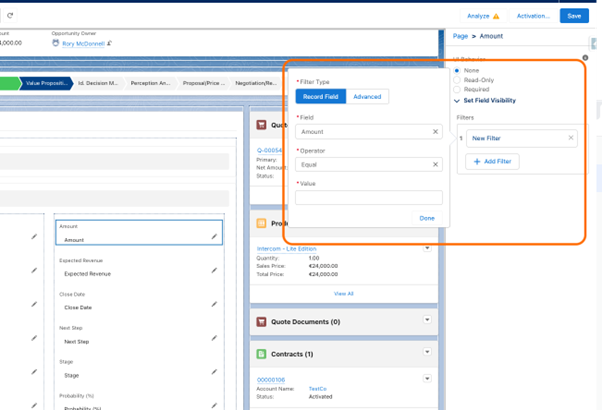
Step 3 – Filter certain fields and sections Finally, you can control the visibility of these fields and sections using criteria directly set on the lightning page. This is very helpful if certain data is only relevant at certain times or for certain people. For example, perhaps a Sales Manager should only be able to see certain sections of the page. In this case, a criteria based on Role could be used to show/hide the relevant details.
I hope that gives you a quick sense of how you might use this functionality for your org and improve on current processes.
Thanks for reading,
Rory McDonnell
The Tether Team
#salesforce #salesforcecrm #tethertips #tether #org #dynamicforms